Here is a very cool video revolving around our beloved SR.
I won't spoil the video for you, but it has a nice twist halfway through.
Enjoy....or not.

The Ultimate Riding Experience
omega banner

Showing posts with label Yamaha SR500. Show all posts
Showing posts with label Yamaha SR500. Show all posts
January 28, 2021
Nils Homann and the SR Experience
August 2, 2017
Angry Lane's Yamaha SR500
From Hong Kong comes this Yamaha SR500, built by the brothers Guillaume and Ben Barras. They call themselves Angry Lane.
For their build they've chosen one of our Norton aluminium tanks. Their creation even made it on BikeEXIF !


June 25, 2015
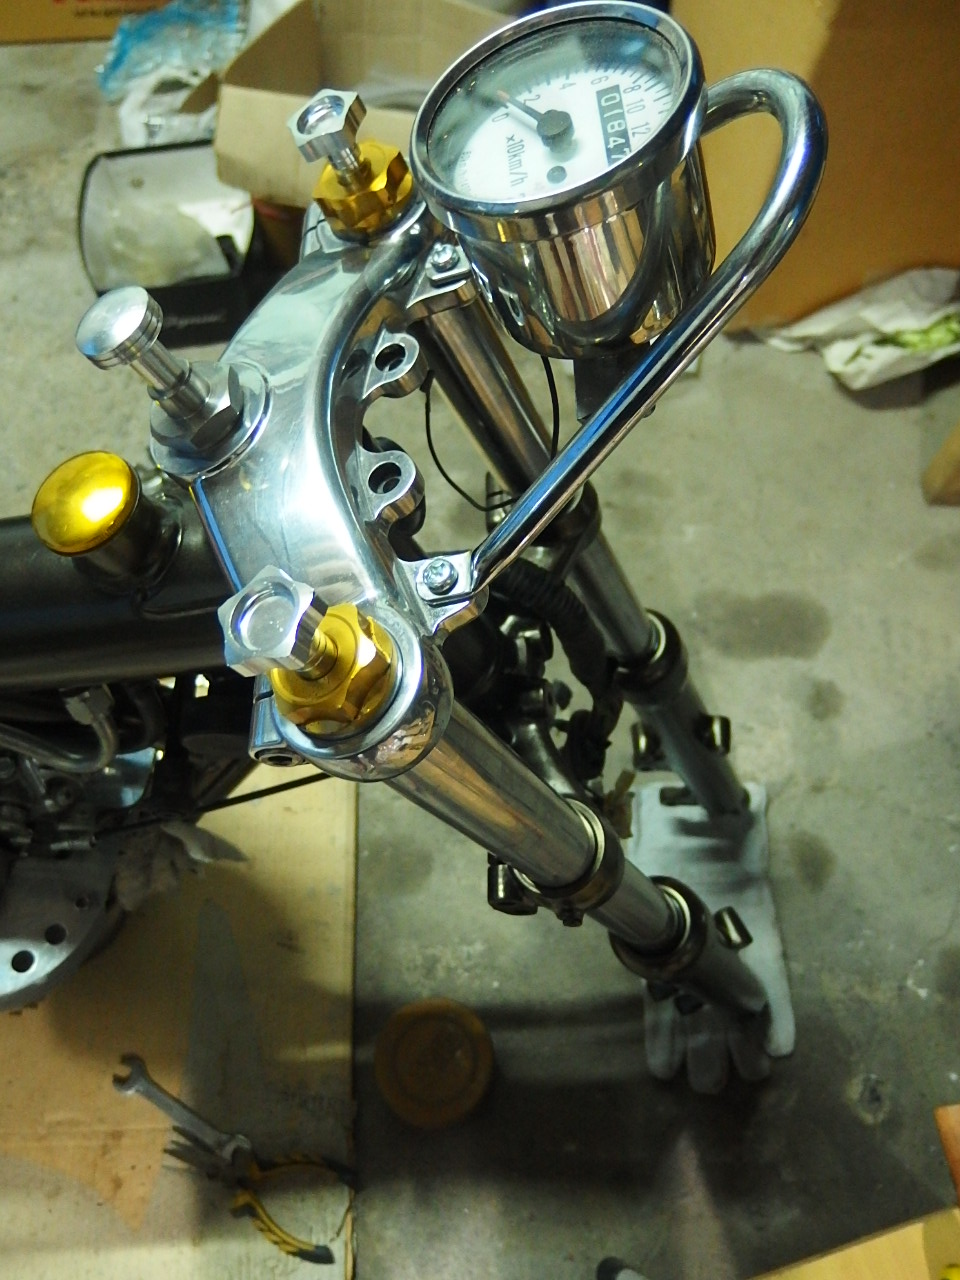
Project Sunmaster 14: Front Forks
After getting the lower forks powder coated, the shop didn't reassemble them, saying that the top screw had to be replaced. So, while I was at it, I bought some nice aluminium caps to adjust the spring preload and a pair of WM progressive springs.
Initially, I planned on putting them together by myself, but after finding out that I had to make a special tool to tighten up the innards of the fork, I had to throw in the towel (no welder). Instead I went to my friend Nose who already worked on my engine and together we got the little puppies back together in no time.
Schematics and detailed part list:
http://www.bikebandit.com/yamaha-motorcycle-sr500g-1980-front-fork/o/m7626sch213986

Happiness is.....a set of forks to continue the bike build

Initially, I planned on putting them together by myself, but after finding out that I had to make a special tool to tighten up the innards of the fork, I had to throw in the towel (no welder). Instead I went to my friend Nose who already worked on my engine and together we got the little puppies back together in no time.
Schematics and detailed part list:
http://www.bikebandit.com/yamaha-motorcycle-sr500g-1980-front-fork/o/m7626sch213986
Happiness is.....a set of forks to continue the bike build

June 16, 2015
New arrivals at Omega Racer
I've been supporting the guys from "The Sports" from the start. Seeing how meticulously they work on their bikes and the painstakingly attention to detail they employ when crafting their custom parts, I knew I'm onto a winner. It was full sails ahead for me from then on.
I started with offering their custom seat cowl about 2 years ago. Now, I'm proud to introduce some of their new goodies, namely a very cool leather side bag that you'll find only at Omega Racer, clip on handlebars and headlight brackets for 35 and 41mm forks, mini switches and rear turning light brackets.
I can't overemphasize that when you're getting a "The Sports" part, you're getting the best money can buy. No compromises.
Just look at the pictures...they speak for themselves...


Mini switches


March 5, 2015
Yamaha XJR1300 by The Sports
Our friends at The Sports are making big waves again with their custom built Yamaha XJR1300, by appearing on a feature article on Bike EXIF (TOP 5 XJR1300 Customs). Bike EXIF is the biggest bike blog on the net, so it's definitely not a small achievement!
The Sports supplies us at Omega Racer with some beautiful and exclusive Yamaha SR parts, too.
Check out the custom made seat cowl or the stylish rear turn signal brackets.
We'll also add The Sports mini switches and refined clip-ons shortly!
The Sports are well known for their outstanding craftsmanship and their attention to the tiniest details. Check out these pictures to get some inspiration and motivation for your next build!
.jpg)
.jpg)
.jpg)
.jpg)
.jpg)
.jpg)
.jpg)
.jpg)
.jpg)
.jpg)
.jpg)
.jpg)
.jpg)
.jpg)
.jpg)
.jpg)
The Sports supplies us at Omega Racer with some beautiful and exclusive Yamaha SR parts, too.
Check out the custom made seat cowl or the stylish rear turn signal brackets.
We'll also add The Sports mini switches and refined clip-ons shortly!
The Sports are well known for their outstanding craftsmanship and their attention to the tiniest details. Check out these pictures to get some inspiration and motivation for your next build!
February 12, 2015
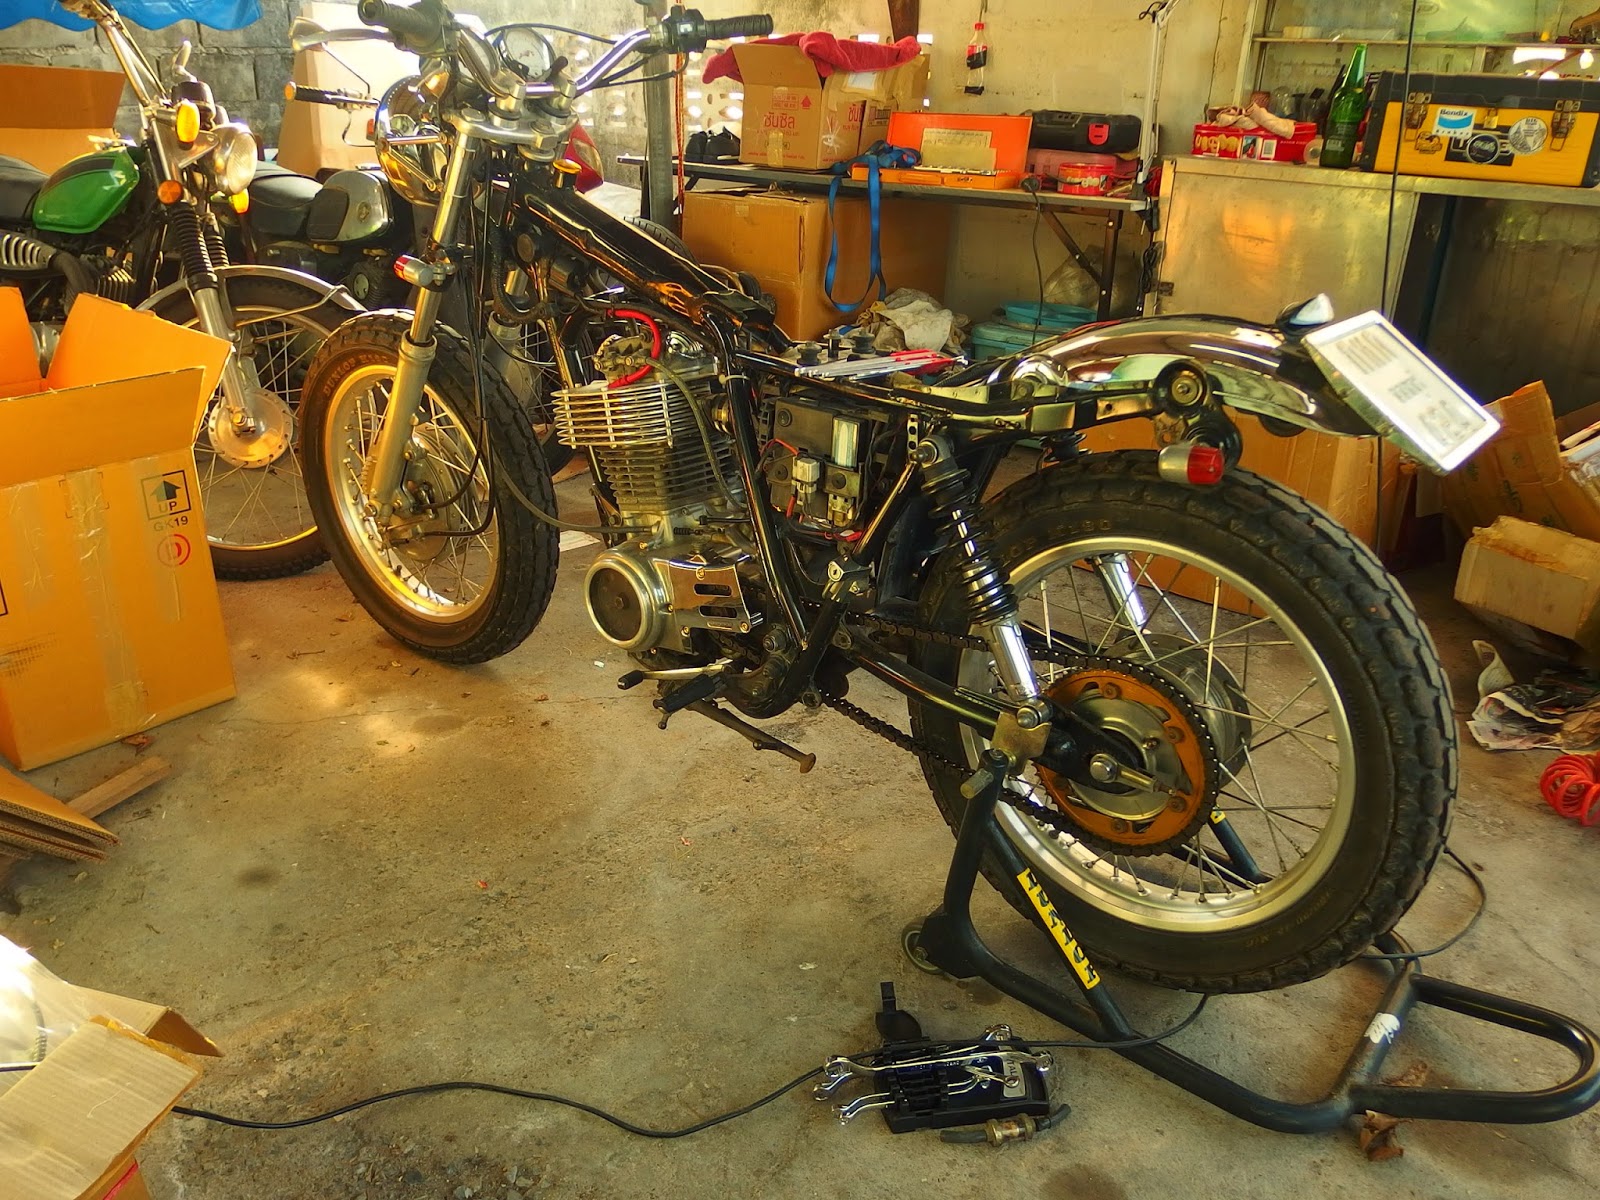
New Project Bike: SUNMASTER 14
This is the very first post of what will be a pretty long thread. This is the beginning of a new adventure.
Please allow me to introduce my new project: SUNMASTER 14.
Sunmaster 14 is the name of my new SR love child. The name comes from a character from the Isaac Asimov science fiction series "Foundation". Ironically, in juxtaposition to his grandiose name, Sunmaster 14 is a person of rather understated qualities. I immediately loved the name and the stark contrast it highlighted and I made a mental note to use that name some time in the future. Skip 5 years forward to the present.
I won't give away all the details of my new bike for 2 reasons. First of all, it is still mainly in my head, so things can change pretty fast once you try to put your ideas into practice. Secondly, I believe the project should be a step-by-step discovery for you as it is for me.
This will be the first time I single handedly build a bike from scratch. That means stripping my beloved street tracker to the bare bones and rebuilding it following a completely new concept. I will share my frustrations as well as my little triumphs, so as to give an insight to other novice builders like me, to what it means building a bike. The more expert builders among you will probably face-palm themselves pretty often. Please forgive my ignorance, I'm still learning.
Sunmaster 14 will follow a short list of guidelines:
- sleek, essential design
- form follows function, but form is still important
- SM14 will be inspired by the past, with small and unintrusive hints to the present
- most importantly: SM14 will not be a CAFE Racer! Verily I say unto you, Sunmaster 14 will take out the 'cafe' from the 'Cafe Racer'!
Starting point is my 1998 Yamaha SR400, which I continuously customized over the course of 5 years.

First step is to strip down the bike completely.


Taking off the seat and tank doesn't require any special skills. When it comes to the wiring loom however, the hair on my neck stand up to attention. Carefully labeling every plug and wire is a must.

After a fierce battle, the beast has been killed!

Quick jump forward...
Removed all electrical components, handlebar and top yoke, fenders, rear tire and the engine of course. Extracting the motor was actually much easier than I anticipated. With one simple movement it came out sideways. Piece of cake!


I had a broken bolt on the lower triple tree. Drilled it. Extracted it. Boom. Problem solved.


Next, slide the front forks out of the triple tree. When you remove the triple tree, the old ball bearings will fall out. Don't worry, they are meant to be like that. Best thing is to change them with new conical tapered bearings!


The bearing housing is stuck tightly inside the neck. Here's my special ball bearing remover tool...

After removing the swingarm and once the frame is bare, I got rid of that ugly helmet lock bracket and the original exhaust bracket.


The engine went off to a shop in Bangkok to get cleaned up, a new cam chain installed, valves cleaned, cylinder powder coated black and brushed side covers + sprocket cover.
Mine is on the right.

Before....


The frame came back last week. At first it looked alright, but once I unwrapped it completely, this is what I discovered...


Needless to say that I was pretty pissed of, but this being Thailand, I had to adhere to the Thai custom of not showing my true feelings. So, armed with a copious amount of self control, I went back to the shop. My Thai is basic at best, but by continuously pointing at the hard evidence, I got the message across. Now the frame is back at the powder coating shop and should be back next week. Fingers crossed!
Update will follow soon!
Subscribe to:
Posts (Atom)