October 9, 2011

What's going on inside a BMW S1000RR?

Ever wondered what was going on inside the engine of your bike when you
would ride the shit out of it? Well, watch this video and you might get an idea.

This video shows an operational cutaway of a BMW S1000RR — a 193HP superbike — bumping against its 14,200RPM redline. A cam and valvetrain at 118 cycles per second is an amazing sight (and sound)

October 6, 2011

Omega Racer in Khao Yai National Park

You know you had a great trip when.......

- you rode through a flooded area......check
- you almost got killed by an ambulance, overtaking an overtaking car..........check
- you had a small breakdown on the side of the road.......check
- you met a friendly local who drove off to fetch a mechanic.......check
- your bike got fixed for free..........check
- you got soaked by a torrential rain.......check
- you rode through a national park with great roads and mountain views.......check
- you avoided animals, like 3m long snakes, monkeys and aeroplane-sized birds......check
- you admired a beautiful sunset.........check
- you arrived home to your smiling wife just when it got dark........check
- you rode for 8hours and your buttocks hurt like hell............CHECK


October 5, 2011

New Bike That Runs On Poop!

The Japanese are amazing people. After the Big 4 it's now time for Toto's poop bike. Yes, you heard right...a bike (a trike, actually) that runs on poop, or faeces if you like. Similar to the famous Delorean in "Back to the Future", but can you travel in time propelled by your farts?


You can read the full article HERE.


And see the original Japanese website with video HERE.

October 4, 2011

SR with book FOR SALE

From now on I will post interesting classified ads of bikes and interesting parts based here in Thailand. The ads I'll feature here all have a Green Book, meaning they are legally registered. How 'legal' those books are is for you to find out and I take no responsibility for them. Check out my previous post regarding buying an SR and the whole Green Book story. HERE
I'm in no way associated with any seller. These posts are purely for your information.

Here we go:
SR400  130.000Baht 
http://www.srthailand.com/forums/index.php?topic=5139.0

Fact Or Fiction?

Well, personally I don't think it's real, but it sure as hell looks real. Kudos to the SFX guy!


SR at the Temple

Went for a short trip with my wife and ended up at a nice temple.


October 3, 2011

Bike of the Week 12

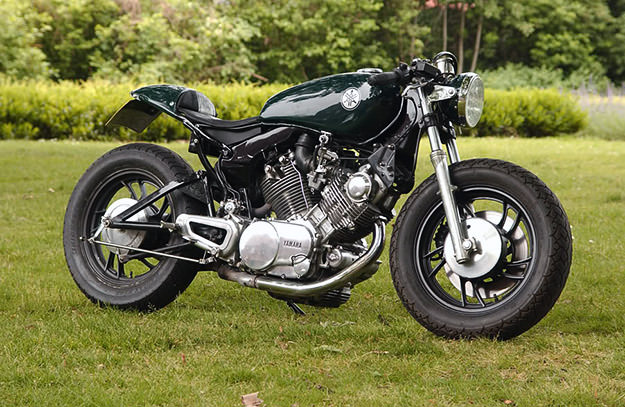
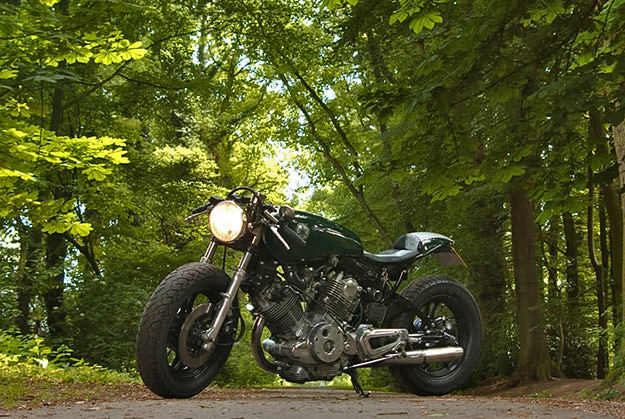
Maybe you were like me and thought the Yamaha Virago was a very boring bike. Well, it was, but sometimes  a beautiful swan can come out of an ugly duckling.
This here is a 750cc 1981 model, beautifully rebuild by Haaksbergen in the Netherlands. I think it looks great!


Yamaha Virago custom

Yamaha Virago custom

SR Thailand Meeting

If you live in Thailand and you own a Yamaha SR, you probably heard of the online community at srthailand.com. They've only been active since 2009, but they can already count on a substantial following of SR enthusiasts.
On December 3rd, the 2nd SR meeting will gather some of the best SR's in Thailand. It will be held in Suphanburi at a presently unspecified resort. More details will follow soon...
I know, I won't miss it!


October 1, 2011

Little HOW-TO corner: 12V lighter socket for GPS and Phone Charger

I love the classic look of my Yamaha SR400. At the same time however, I do appreciate some comforts modern technology offers. That's why I decided to add a 12V lighter socket to my bike. It will keep my phone charged and enable me to bring along my (car) GPS on longer tours.

There are very helpful and detailed instructions on how to do it here, but I'll show you my rather low-tech version.
What you need:
- 12V cigarette lighter socket
- electrical connections (plug and socket)
- a ON-OFF switch
- 1m cable (red and black)


I also strongly advise to solder all your connections. If you only put them together manually, they will easily oxidise (lower the conductivity) and are easily subjected to loosening and breaking due to the bikes vibrations.

Also necessary are isolating, heat-shrinking tubes to keep dirt and water away from your connections and the ever helpful electrical tape (not in the picture).

-
These are the metal connectors for the plastic plug (and socket). Solder your plus and minus cables on them and stick them in the plug (and socket). Make sure the red wire connects to the red and the black to the black. Once you put the metal connectors in the plastic  plug (or socket), you can't take them out again. (see those little hooks?)


This is the connection that goes from the battery to the switch.


12V lighter socket with GPS plug


Solder your negative and positve wires onto the base of the socked as shown in this picture.


Next, remove the battery connection to avoid accidental shorts. Cut those wires and add your connector to them. Solder and isolate with electrical tape and/or heat-shrink tubes. I used both. I used the white plastic connection just because it gives me the freedom of a 12V outlet for other things, should the need arise, but you can also do without it.


I drilled a small hole in the toolbox opening and inserted the switch. Having a switch is good in my opinion, as I don't want to have power in the socket all the time. You never know if a lizard decides to go there and commit suicide, frying your battery at the same time.


The socket and the switch fit easily inside the toolbox. There's still enough space for my emergency tools.


There's no visible alteration to the bike's aesthetic once the plastic side cover goes back.

I'm sure there are other and more professional ways to do it, but I think this is good enough. It works and it doesn't affect the look of the bike and that's what matters.