June 25, 2015

Project Sunmaster 14: Front Forks

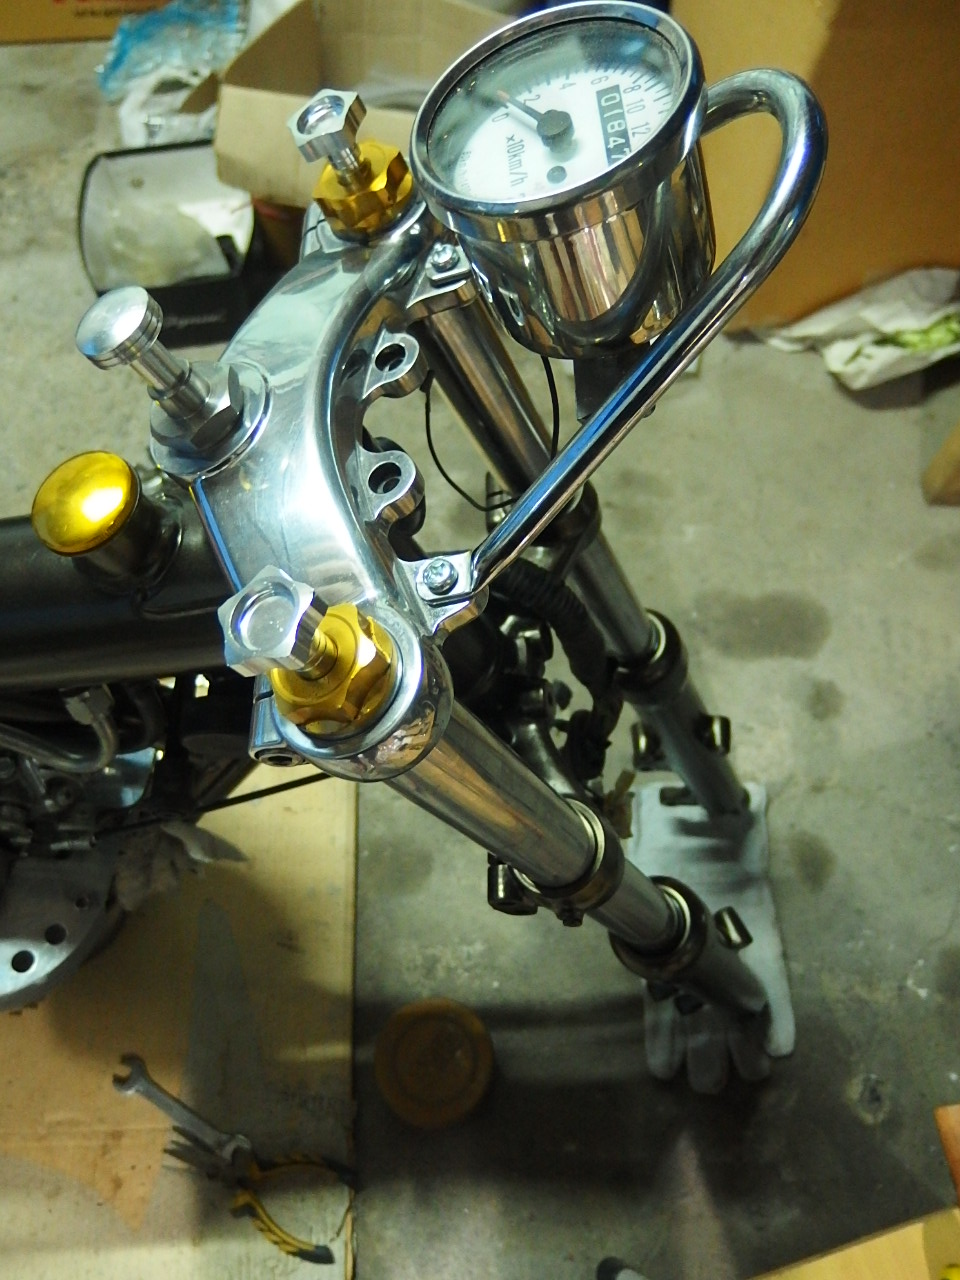
After getting the lower forks powder coated, the shop didn't reassemble them, saying that the top screw had to be replaced. So, while I was at it, I bought some nice aluminium caps to adjust the spring preload and a pair of WM progressive springs.

Initially, I planned on putting them together by myself, but after finding out that I had to make a special tool to tighten up the innards of the fork, I had to throw in the towel (no welder). Instead I went to my friend Nose who already worked on my engine and together we got the little puppies back together in no time.

Schematics and detailed part list:
http://www.bikebandit.com/yamaha-motorcycle-sr500g-1980-front-fork/o/m7626sch213986


Happiness is.....a set of forks to continue the bike build


June 21, 2015

Sunmaster 14: Carb and filter cleaning

Not too much to report today. Gave the Keihin CR38 and the K&N filter a thorough cleaning.
I didn't have any specific cleaner for the filter, so decided to use hand wash powder. The stuff we use to clean even the blackest of hands. It de-greased the filter pretty well. Now I just have to find an airfilter oil and it'll be ready.


Love those sexy cooling fins!


I also installed a new kickstart lever


Next on my list are the clip-ons with Tommaselli grips and "The Sports" mini switches. Huuummm, yummy!!!

June 18, 2015

Update on my Project SR: Sunmaster 14

An update has been long due. After the setbacks with powder coating the frame I finally got back on track and managed to get some work done.
The frame and front forks came back looking great. The forks were not assembled though, so that was the perfect excuse for me to order a pair of progressive springs from Webike in Japan.

I really love the new frame color!

Type 1 aluminium swingarm. It's a work of art, but I will change it to a more classic looking Type 2 swingarm today.

Only the best for my baby: a set of Ohlins!

Put the engine in by myself. First mask the frame with some paper tape or similar to avoid scratches. Next, lean over the engine and lift, inserting it through the right side of the frame. If you have a willing friend around, maybe better...


I installed the upper and lower steering bearings and this nice compression release setup that fits in the spindle mount and will considerably clean up the controls on the clip ons. (A detailed HOW-TO will follow soon).


Next, I started on something I really wasn't looking forward to: the electrics.
To clean up the ugly cable mess I used a battery tray that fits nicely under the seat. This way I can get rid of the big battery box.(Again, a more detailed HOW-TO will follow soon).


Still trying to find the best location for all the electric bits and pieces.


And here's the Type 2 aluminium swingarm
Which one do you like better? (A HOW-TO on how to install a swingarm soon on this blog!)


June 16, 2015

New arrivals at Omega Racer

I've been supporting the guys from "The Sports" from the start. Seeing how meticulously they work on their bikes and the painstakingly attention to detail they employ when crafting their custom parts, I knew I'm onto a winner. It was full sails ahead for me from then on.

I started with offering their custom seat cowl about 2 years ago. Now, I'm proud to introduce some of their new goodies, namely a very cool leather side bag that you'll find only at Omega Racer, clip on handlebars and headlight brackets for 35 and 41mm forks, mini switches and rear turning light brackets.

I can't overemphasize that when you're getting a "The Sports" part, you're getting the best money can buy. No compromises.

Just look at the pictures...they speak for themselves...


Mini switches


Yamaha SR400 by Arden Fiegert

Arden is an Omega Racer customer who, very creatively, put together this unique Yamaha SR400.
This bike has stirred up some controversy online recently....Love for the creativity and hate for the unusual lines. 
I, for one, love people who's only care is to express their creative drive, without having to measure up to other's people ideas of what a cafe racer, or custom bike in general, should look like.

Love it or hate it, here it is:


June 6, 2015

Classic Ducati belt buckle

While constantly surfing on the waves of the web, I also visit countless Facebook groups where I share my passion with many other bike enthusiasts around the globe. One one such group dedicated to Vintage Ducati Singles I met a guy who put me in contact with another remarkable person: Tom Rolland.

Tom has restored 8 Ducati 750GT over the past years and has now just finished bringing a Guzzi 850 Eldorado ex LAPD back to life.


However, as great as it looks, the Guzzi is not why I'm writing this. Tom is well known for making stunning hand made belt buckles with the classic Ducati valve covers design.


They come in 2 versions, big for 1.5 inches belts and small for 1 inch belts. Also, both sizes come either made of brass or solid Sterling silver.
Here are the brass buckles I've ordered.


Tom is not really looking to make a business out of them, but if you're interested in getting one, I'm sure he'll be happy to make one for you. Send him an email HERE


June 4, 2015

Riding Course at Bira International Circuit

This has been on my bucket list for a while now.
To (re)learn how to ride a bike and gain experience on a track. In my case, I heard about this on the 'Expat Bikers (Thailand)' Facebook group.

Our instructor was Graham, who explained to us the basics of controlling a bike. The day started at 8am and finished after lunch. I opted to rent a Kawasaki ER6n from Graham, because I couldn't risk trashing my own. You never know.... Boots and leathers are provided, just bring your own helmet.

Now, I've been riding for over 25 years with a very small accident count. Riding safe and riding well are definitely connected, but they aren't the same thing. Just as I thought, there were several things I do wrong when riding. Holding the handlebar too tightly for example, sitting up too stiff, not shifting enough weight and wrong feet positioning in the turns, turned out to be my biggest shortcomings.

With Graham's help though, and several laps later, I started to get 'it' and my confidence grew accordingly. Hadn't it been for a sudden downpour, I think I would have put down that knee where it belonged, on the tarmac!

Bira is open for bikes in the morning and cars in the afternoon. You can just turn up there and for a fee of 1.200Baht ride your bike the whole morning. (Riding instructor not included!)

Verdict: A very enjoyable day. I would recommend all bikers out there to take such a course. The only thing I missed were some refreshments or the chance to make a cup of coffee.