

This is the very first post of what will be a pretty long thread. This is the beginning of a new adventure.
Please allow me to introduce my new project: SUNMASTER 14.
Sunmaster 14 is the name of my new SR love child. The name comes from a character from the Isaac Asimov science fiction series "Foundation". Ironically, in juxtaposition to his grandiose name, Sunmaster 14 is a person of rather understated qualities. I immediately loved the name and the stark contrast it highlighted and I made a mental note to use that name some time in the future. Skip 5 years forward to the present.
I won't give away all the details of my new bike for 2 reasons. First of all, it is still mainly in my head, so things can change pretty fast once you try to put your ideas into practice. Secondly, I believe the project should be a step-by-step discovery for you as it is for me.
This will be the first time I single handedly build a bike from scratch. That means stripping my beloved street tracker to the bare bones and rebuilding it following a completely new concept. I will share my frustrations as well as my little triumphs, so as to give an insight to other novice builders like me, to what it means building a bike. The more expert builders among you will probably face-palm themselves pretty often. Please forgive my ignorance, I'm still learning.
Sunmaster 14 will follow a short list of guidelines:
- sleek, essential design
- form follows function, but form is still important
- SM14 will be inspired by the past, with small and unintrusive hints to the present
- most importantly: SM14 will not be a CAFE Racer! Verily I say unto you, Sunmaster 14 will take out the 'cafe' from the 'Cafe Racer'!
Starting point is my 1998 Yamaha SR400, which I continuously customized over the course of 5 years.

First step is to strip down the bike completely.

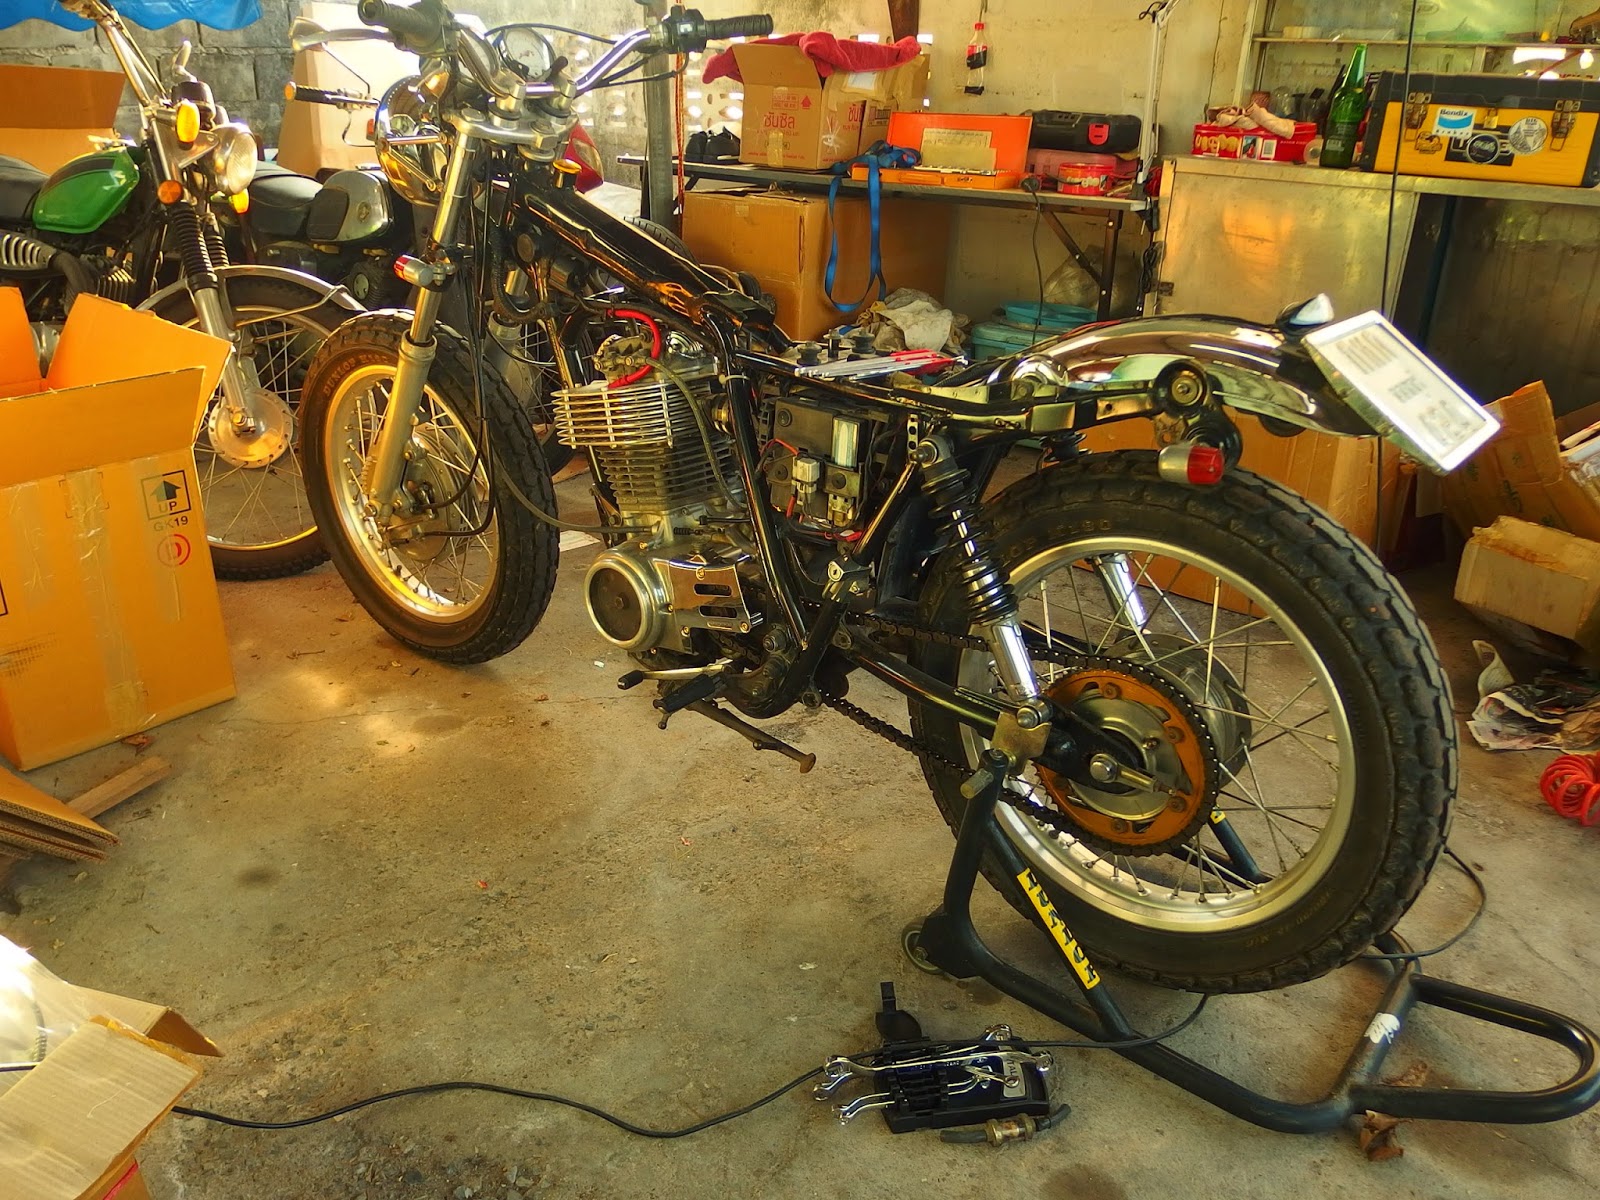

Taking off the seat and tank doesn't require any special skills. When it comes to the wiring loom however, the hair on my neck stand up to attention. Carefully labeling every plug and wire is a must.

After a fierce battle, the beast has been killed!

Quick jump forward...
Removed all electrical components, handlebar and top yoke, fenders, rear tire and the engine of course. Extracting the motor was actually much easier than I anticipated. With one simple movement it came out sideways. Piece of cake!


I had a broken bolt on the lower triple tree. Drilled it. Extracted it. Boom. Problem solved.


Next, slide the front forks out of the triple tree. When you remove the triple tree, the old ball bearings will fall out. Don't worry, they are meant to be like that. Best thing is to change them with new conical tapered bearings!


The bearing housing is stuck tightly inside the neck. Here's my special ball bearing remover tool...

After removing the swingarm and once the frame is bare, I got rid of that ugly helmet lock bracket and the original exhaust bracket.


The engine went off to a shop in Bangkok to get cleaned up, a new cam chain installed, valves cleaned, cylinder powder coated black and brushed side covers + sprocket cover.
Mine is on the right.

Before....


The frame came back last week. At first it looked alright, but once I unwrapped it completely, this is what I discovered...


Needless to say that I was pretty pissed of, but this being Thailand, I had to adhere to the Thai custom of not showing my true feelings. So, armed with a copious amount of self control, I went back to the shop. My Thai is basic at best, but by continuously pointing at the hard evidence, I got the message across. Now the frame is back at the powder coating shop and should be back next week. Fingers crossed!
Update will follow soon!
3 comments:
Sounds like a really exciting project. I agree with ditching the helmet lock bracket - also I'm removing the rear indicator mounts off the back of my frame. I just think they look a bit odd. I'm mounting my indicators a bit further back, but I've seen other people fit plates for them at the top of the rear shocks.
Also engine is looking pristine! Do you have a recommendation for a workshop that can do this? Did they strip/rebuild the engine too?
Look forward to seeing this progress...
Thank you.
I have those rear indicator plate for sale if you're interested:
http://www.omegaracer.com/parts_store/prod_3567122-The-Sports-Rear-Turn-Signal-Brackets.html#sthash.qd9uzFws.dpbs
Are you based in Bangkok? If yes, then there is Mr. "Nose" of Paknam 2 Wheels in Samut Prakarn, who is a great guy and who prepared my engine. I highly recommend him. It's a small shop, but he works with the right attitude, which is a rare quality in Thailand.
He cleaned the motor, changed the cam chain, cleaned the inside, powder coated the cylinder, but didn't touch the crank case interior.
Thanks for the info - I actually have Nose's business card on my desk right now! Certainly looks like he did a good job of it.
Post a Comment